Disclosure: This post contains affiliate links, and I may receive a small commission should you purchase any linked products – just know I never link anything I don’t personally use and love! I’ve got you, friend.
Peeps Sugar Cookies

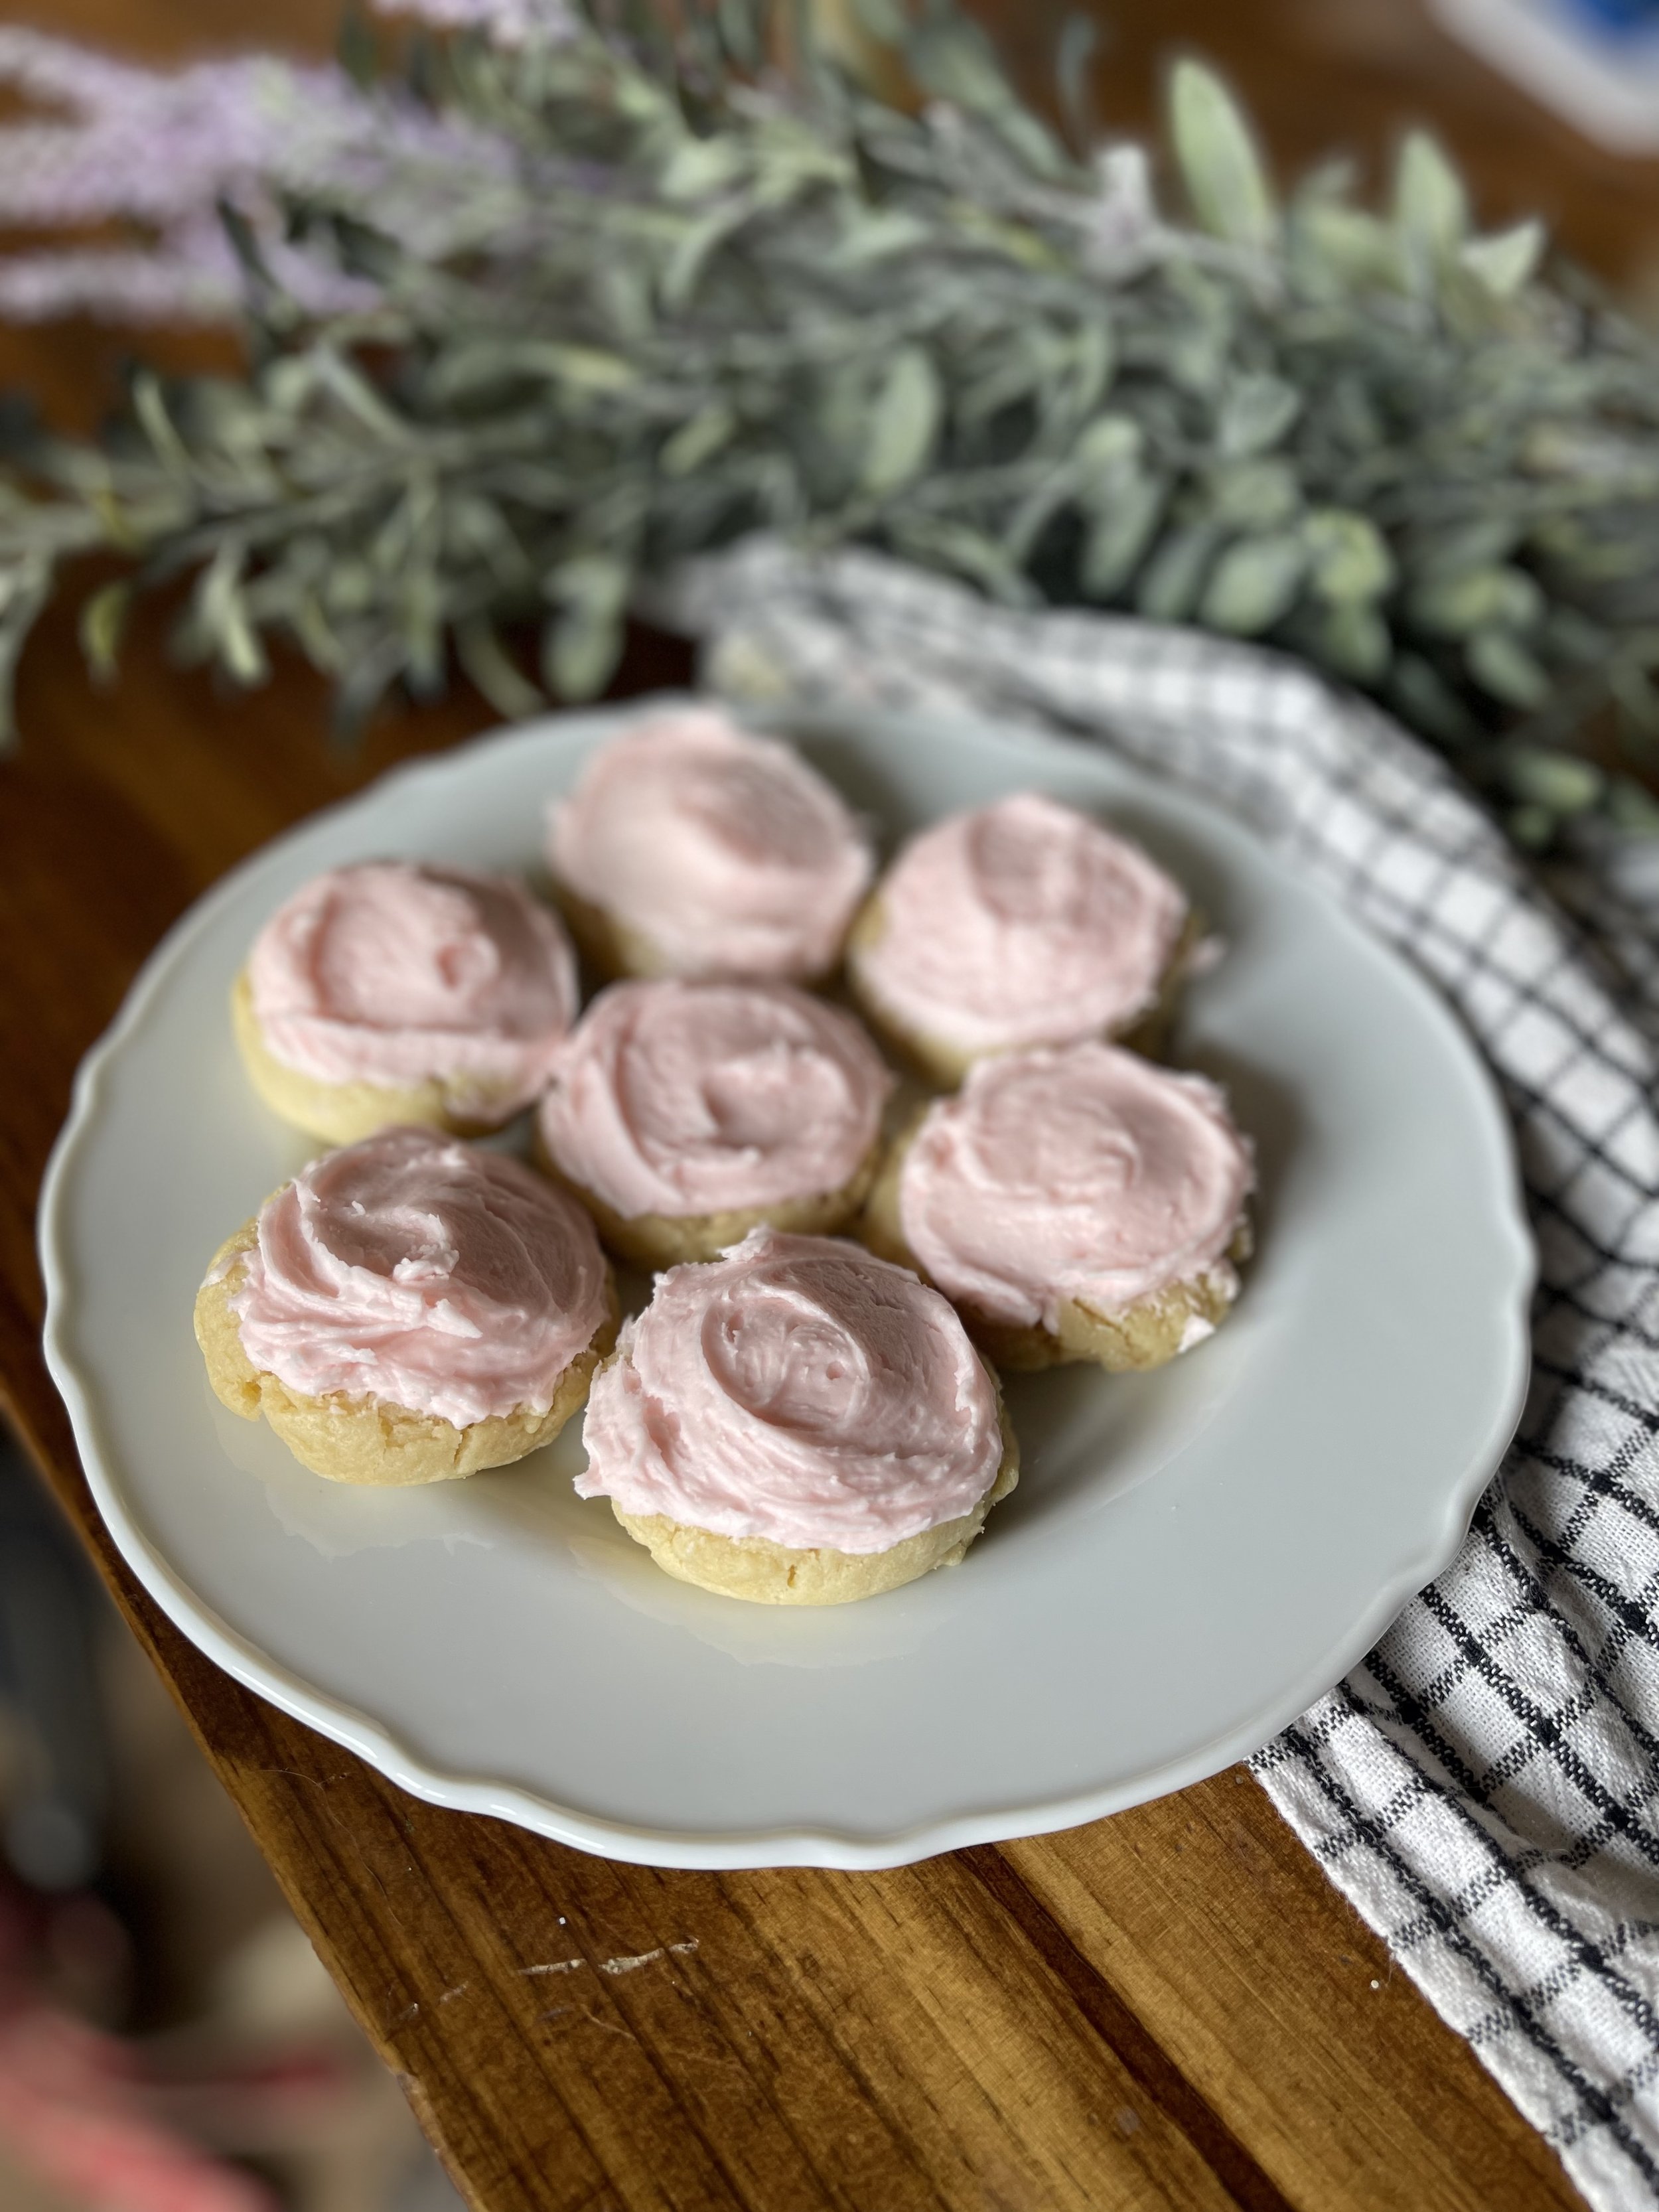
Peeps Sugar Cookies
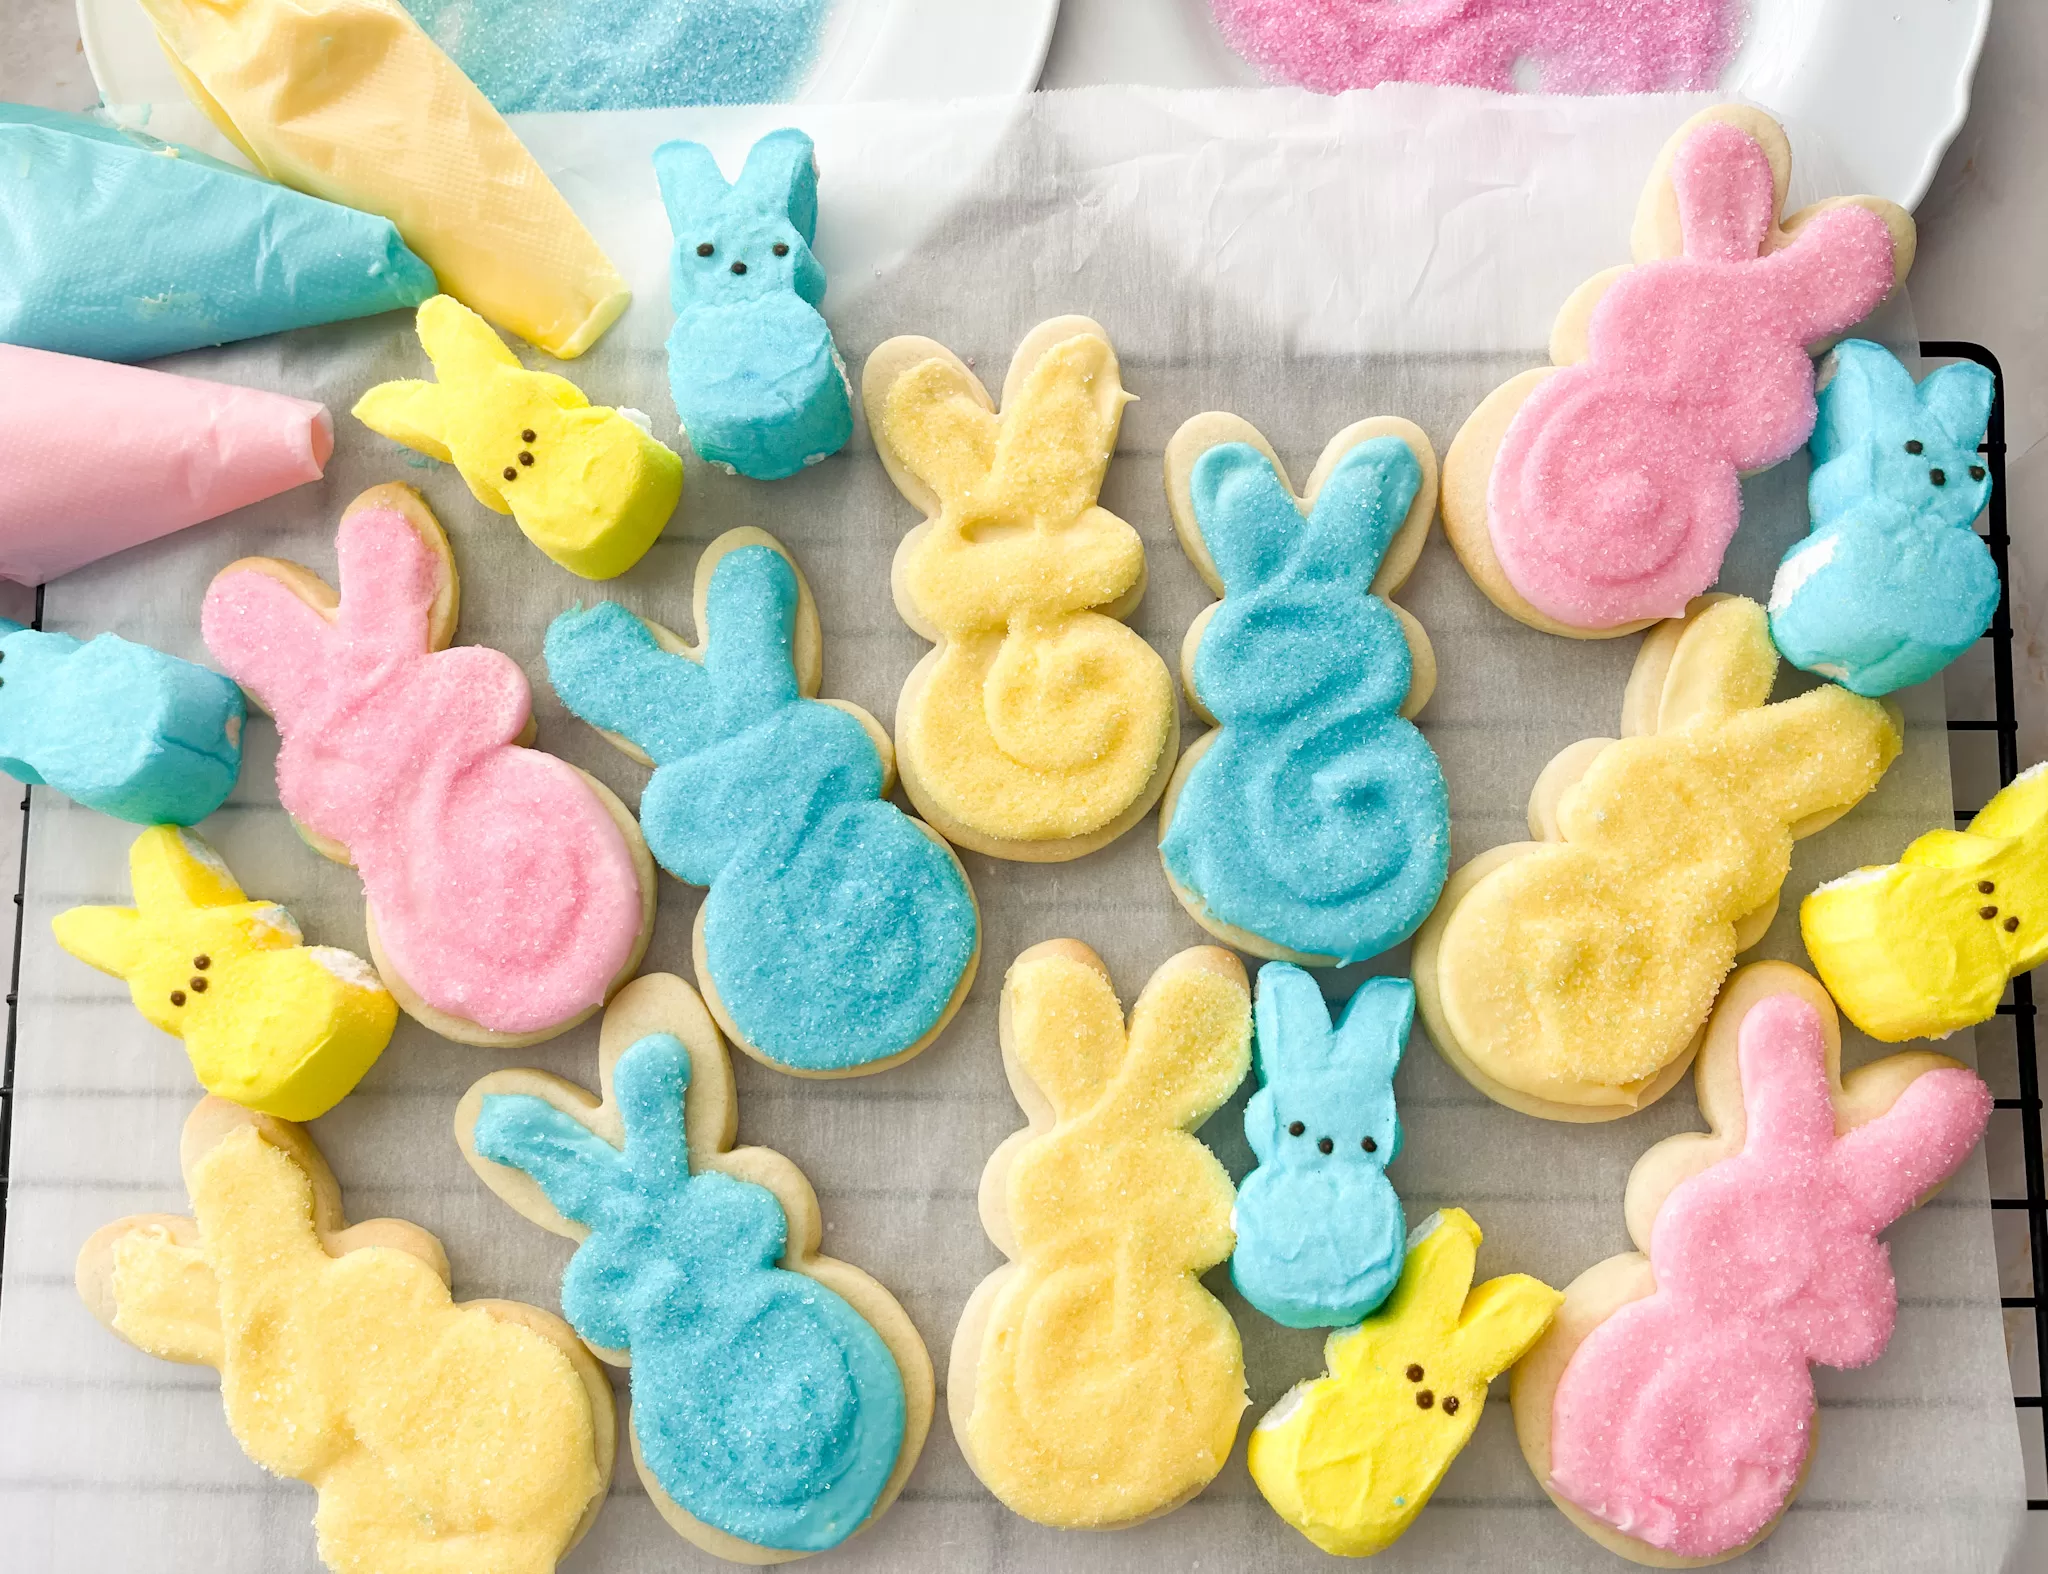
Spring is definitely my favorite season, and I cannot wait to celebrate with all the Spring and Easter treats! I also think that Easter has the best seasonal candy! If you love Peeps, then you’ll adore these Peeps sugar cookies! Combining the classic sweetness of sugar cookies with the colorful and playful appeal of Peeps, this treat is bound to put a smile on your face. Whether you’re baking for a party, a family gathering, or just to celebrate the season, these cookies are an easy and delightful way to get in the Easter spirit.

Why Peeps Sugar Cookies Are a Must-Try
Peeps have long been a nostalgic Easter candy, often found in baskets or as a whimsical snack. They are soft, sugary, and come in a rainbow of colors, making them perfect for decorating treats like sugar cookies. These cookies combine the fun colors and visual appeal of peeps with the sweet marshmallow flavor. Using my classic Sugar Cookie Cutout recipe, and topping it with a marshmallow buttercream makes this cookie so cute and quite simple to make.
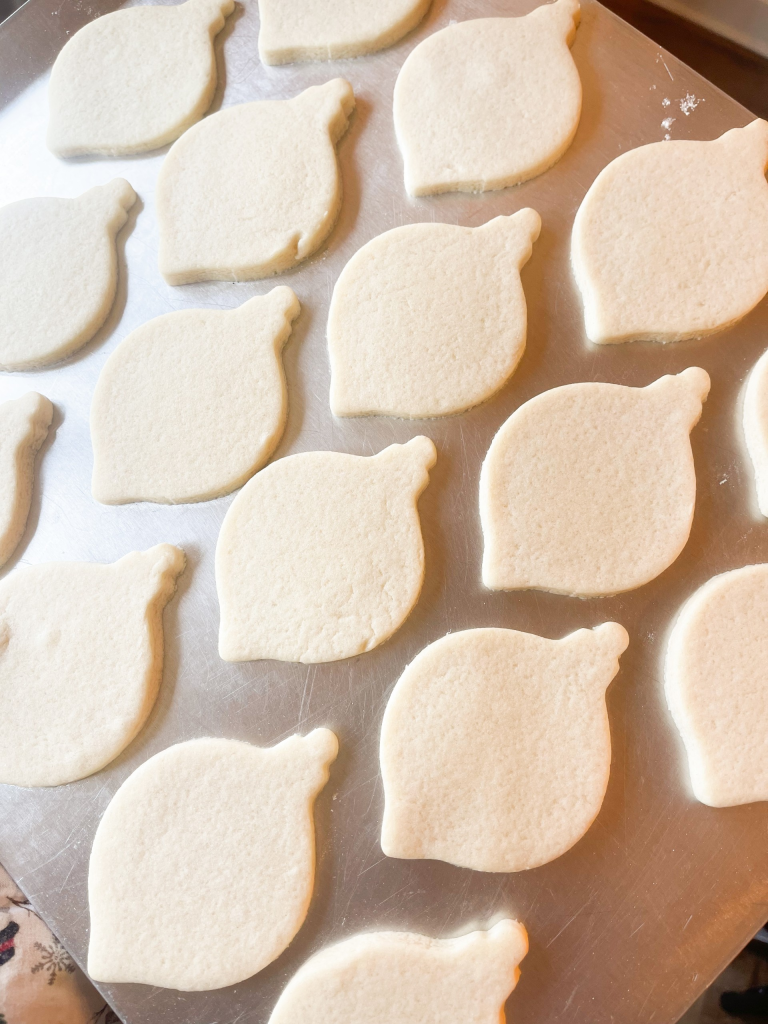
Easy Sugar Cookie Cutouts – No Spread!
This recipe is SO reliable and turns out perfectly every time. My favorite part is that this dough never spreads. It doesn’t matter what shape you cut your dough into – you will have the same shape after baking!

Essential Tips for Perfect Sugar Cookies
1. Use Room Temperature Ingredients
For a smooth dough that’s easy to work with, always use room-temperature butter and eggs. Cold butter can cause the dough to be crumbly and hard to roll out.
2. Don’t Overmix the Dough
When combining the wet and dry ingredients, mix until just combined. Overworking the dough will result in tough cookies.
3. Flour Your Work Surface (But Don’t Overdo It)
While rolling out the dough, make sure to lightly flour your work surface, rolling pin, and cookie cutters. However, too much flour can dry out the dough and make the cookies too tough. Keep it light and dust off any excess.
4. Princess Cake & Cookies Emulsion
One really important note – if all you have is vanilla or almond extract then that will work just fine. But let me tell you – LorAnn Princess Cake & Cookie Emulsion takes these cookies to the next level! This baker emulsion is truly the best – it has such a delicious, rich birthday cake flavor. LorAnn bakery emulsions and extracts are one of my kitchen staples.

Love Sugar Cookies? Try my other variations!
- Classic Sugar Cookie Cutouts
- Sprinkle Sugar Cookies
- Sprinkle-Rolled Sugar Cookies
- Strawberry Sugar Cookie Cutouts
Ingredients
- 1 cup salted butter, room temperature
- 1 cup granulated sugar
- 1 egg
- 2 tsp Princess Cake & Cookie Emulsion (or your extract of choice)
- 2 tsp baking powder
- 3 cups all purpose flour
For the Marshmallow Buttercream:
- 1/2 cup salted butter
- 3/4 cup marshmallow creme
- 3 cups powdered sugar
- 1/4 cup milk or cream, + 2 tbsp to add to preference
- 1 tsp vanilla extract
- Pink, yellow, and blue food dye
- Pink, yellow, and blue sugar sprinkles

Instructions
- Preheat oven to 350 degrees.
- Start by creaming together your butter and sugar in your electric mixer with the paddle attachment.
- Once butter and sugar is light and fluffy, add in egg and Princess Cake & Cookie emulsion, mix until combined.
- Add in your baking powder, then add flour 1 cup at a time. Mix well each time you add flour.
- When you’ve added your last cup of flour, the dough may be stiff. You may need to take it out of your bowl and mix by hand.
- Once dough is completely combined, lightly dust a clean work surface with flour and roll out your dough. I like to work with about 1/4 of the dough at a time. If you work with too much at one time it will be difficult to roll out.
- Roll dough to about 1/4-1/2 inch thickness and cut with bunny cookie cutter.
- Transfer to baking sheet, and bake for 6-7 minutes, depending on oven and preference. I never bake mine longer than 7 minutes. If the edges are starting to turn golden brown you’ve baked a little too long!
- Cool completely before decorating.
For the Frosting:
- Cream together butter and marshmallow creme
- Add Vanilla extract, mix until combined.
- Add in powdered sugar, 1 cup at a time, alternating with a little bit of the milk each time
- Once all the powdered sugar is mixed in, mix on high for 1-2 minutes until icing is light and fluffy
- Once the frosting is made, divide into three bowls. Using the three bowls, add a different food dye into each bowl, making three colors of icing. Place each colored icing into a piping bag. If you do not have any, you can easily use ziplock bags. You could also spread icing with a knife.
- Top each cookie with the marshmallow buttercream. After frosting the cookie, dip cookie into the sugar sprinkle of the same color.
- Frost and dip all the cookies – and enjoy because you just made something SO cute and it was simple! Even the most novice of cookie decorators can make these 🙂 Enjoy!

As always, if you give these a try, please let me know what you think!
PrintPeeps Sugar Cookies – with Marshmallow Buttercream
These cookies combine the fun colors and visual appeal of peeps with the sweet marshmallow flavor. Using my classic Sugar Cookie Cutout recipe, and topping it with a marshmallow buttercream makes this cookie so cute and quite simple to make.
Ingredients
-
- 1 cup salted butter, room temperature
-
- 1 cup granulated sugar
-
- 1 egg
-
- 2 tsp Princess Cake & Cookie Emulsion (or your extract of choice)
-
- 2 tsp baking powder
-
- 3 cups all purpose flour
For the Marshmallow Buttercream:
-
- 1/2 cup salted butter
-
- 3/4 cup marshmallow creme
-
- 3 cups powdered sugar
-
- 1/4 cup milk or cream, + 2 tbsp to add to preference
-
- 1 tsp vanilla extract
-
- Pink, yellow, and blue food dye
-
- Pink, yellow, and blue sugar sprinkles
Instructions
-
- Preheat oven to 350 degrees.
- Start by creaming together your butter and sugar in your electric mixer with the paddle attachment.
- Once butter and sugar is light and fluffy, add in egg and Princess Cake & Cookie emulsion, mix until combined.
- Add in your baking powder, then add flour 1 cup at a time. Mix well each time you add flour.
- When you’ve added your last cup of flour, the dough may be stiff. You may need to take it out of your bowl and mix by hand.
- Once dough is completely combined, lightly dust a clean work surface with flour and roll out your dough. I like to work with about 1/4 of the dough at a time. If you work with too much at one time it will be difficult to roll out.
- Roll dough to about 1/4-1/2 inch thickness and cut with bunny cookie cutter.
- Transfer to baking sheet, and bake for 6-7 minutes, depending on oven and preference. I never bake mine longer than 7 minutes. If the edges are starting to turn golden brown you’ve baked a little too long!
- Cool completely before decorating
For the Frosting:
- Cream together butter and marshmallow creme
- Add Vanilla extract, mix until combined.
- Add in powdered sugar, 1 cup at a time, alternating with a little bit of the milk each time
- Once all the powdered sugar is mixed in, mix on high for 1-2 minutes until icing is light and fluffy
- Once the frosting is made, divide into three bowls. Using the three bowls, add a different food dye into each bowl, making three colors of icing. Place each colored icing into a piping bag. If you do not have any, you can easily use ziplock bags. You could also spread icing with a knife.
- Top each cookie with the marshmallow buttercream. After frosting the cookie, dip cookie into the sugar sprinkle of the same color.
- Frost and dip all the cookies – and enjoy because you just made something SO cute and it was simple! Even the most novice of cookie decorators can make these 🙂 Enjoy!
Leave feedback about this